Getting Started With Open Source

I am a web developer from India. I'm currently a junior studying computer science and engineering. I'm here to share my journey and my learnings with the community.
Hey👋 folks, welcome to part two of the Git GitHub And Opensource series. I hope you enjoyed the part one where we discussed Git and GitHub and how you can use them for your personal projects. In this article, we are going to learn how we can use these tools to make contributions to open source projects. In this tutorial we will be using a beginner-friendly open source project so you can make your first contribution easily: link. So buckle up and let's start our tutorial🚀
What is Open Source?
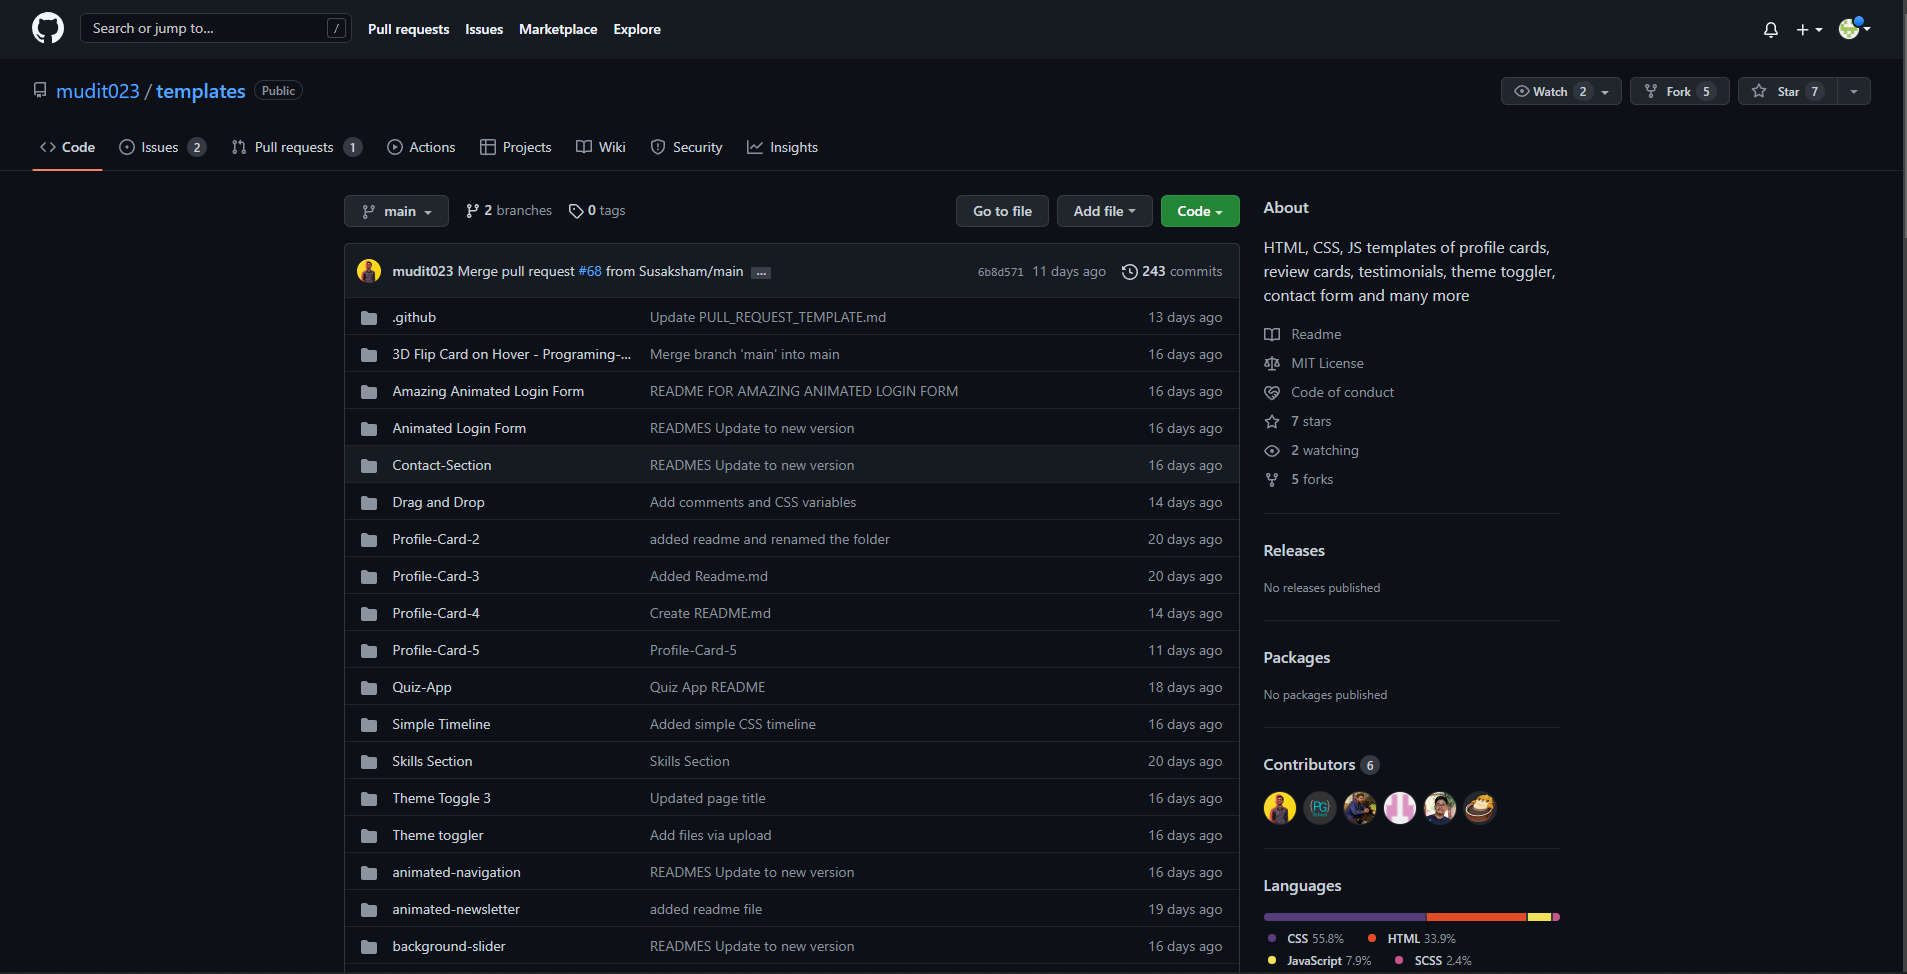
Before learning how to contribute to open source it's important to know what open source projects(software) are. To put it simply, open source software(or project) is software with source code that anyone can inspect, modify, and enhance. It's not just the source code that you can play with, you can also contribute to the documentation of the project, the assets like images, illustrations, and videos used in the project. So you can just pick an open source project look through its assets, find a bug and create a new issue about it or start working on an existing issue(you'll see what an issue is further in this tutorial).
Why Contribute to Open Source?
Working on an open source project has many benefits👇
- 10x Learning: You'll get to learn a lot.
- Exposure: The open source community is super welcoming and you'll get to network with awesome like-minded people.
- Real World Experience: If you are a student or someone who hasn't worked on any real-life project then this is a great way to get experience working on a real-life professional project that might be used by hundreds or thousands or even millions of people.
Now you know what an open source project is and why you should contribute to open source. So let's see how you can contribute.
Contributing to open source project
Step 1️⃣: Select a project
Search for the projects in the language(Java, JavaScript, CSS, HTML, or Documentation) you want to contribute. I created an open source project a few days back and we are going to use that here. Here is the link
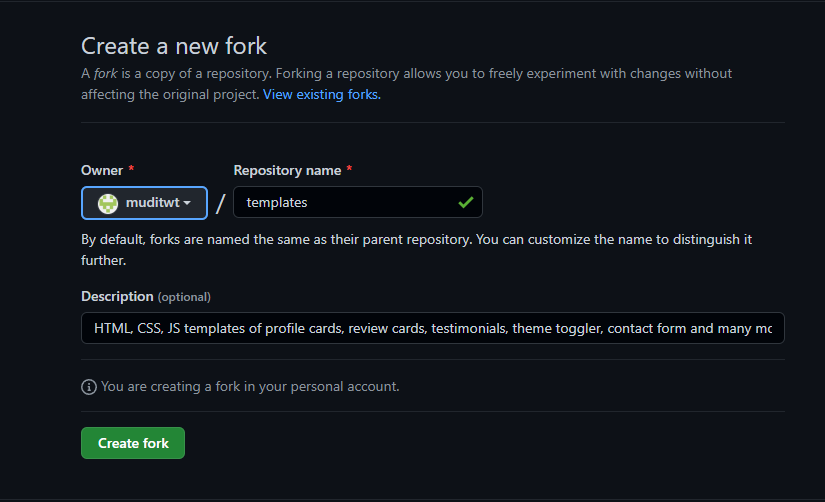
Step 2️⃣: Fork the original repository
Go to the repository, you'll see an option to fork on the top right of the interface.
 Click on it, and then click on create fork.
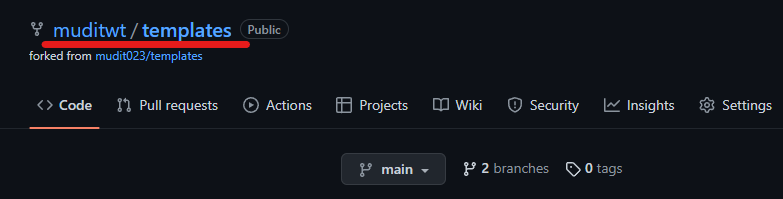
Step 3️⃣: Clone the forked repository
After forking you'll be redirected to your GitHub account and you'll see a copy of the original repository (called upstream) in your own account.
Now clone this repository locally in your system
- Copy the URL of this repository
- Open the terminal on the desktop
- Use the git clone [repository-url] command to clone the project locally
git clone
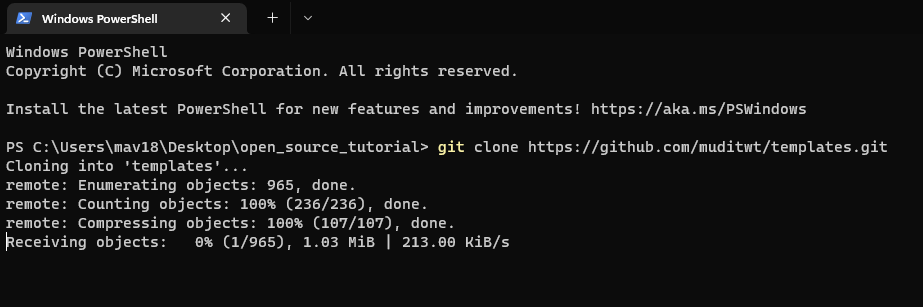
This will download the whole project folder in your system.
Step 4️⃣: Add Upstream
You have to link your locally cloned repository with the original repository(mudit023/templates)
- Open the terminal inside the cloned folder
- Use the git remote add upstream [original repo URL] command
git remote add upstream https://github.com/mudit023/templates
- To check if upstream is added successfully or not use this command
git remote -v
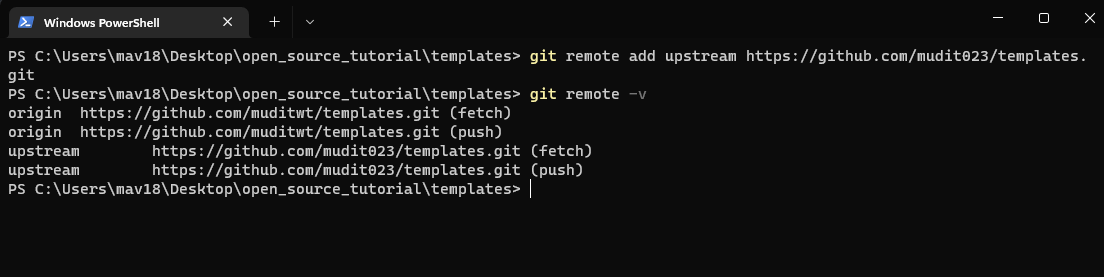
If it returns a message like the above image then you are on the right track👏
Note: We need to add upstream in your cloned repo so that you can pull the changes made in the original(mudit023/templates) repo. There might be other contributors who'll be making changes in the original project, to fetch those changes you need to add upstream and use this command:
git pull upstream main
This will keep your locally cloned repository the same as the original remote repository.
Step 5️⃣: Create a new branch
Before making any changes and creating a pull request(PR) you first have to create a new branch and checkout to it from the main branch. By default, you are on the main branch.
- use git branch -b [new-branch-name] to create and checkout to the new branch at the same time.
git branch -b newContribution
you can name your branch anything(here I'm naming it newContribution) it has to be meaningful though.

Note: Always create a separate branch for every new contribution to the project.
Step 6️⃣: Make your contribution
It's time for the real action✨, you are all set to modify the project. But before that, there are a few things that you need to do every time you want to contribute to an open source project. Go to the project repository
✨ Read the README of the project.
- It'll tell you more about the project.
- How to use that project
- How to contribute to the project(Guidelines)
- Information about where and whom to ask for help when you get stuck
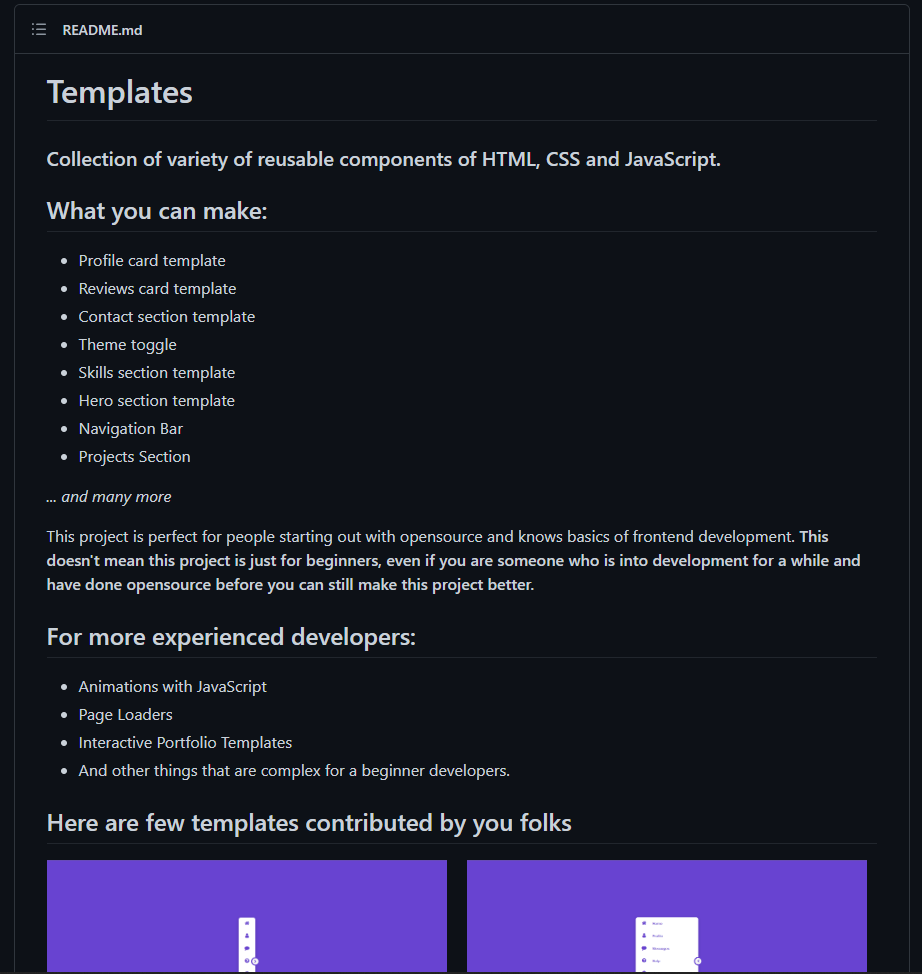
Always read the README of the project ,click here to go to the README of our templates project.
✨ On the top left tab, you'll see the issues option

Click on it and you'll see the bugs listed by others. You can work on these or you can also add a new feature to the project or find a new bug and work on that.
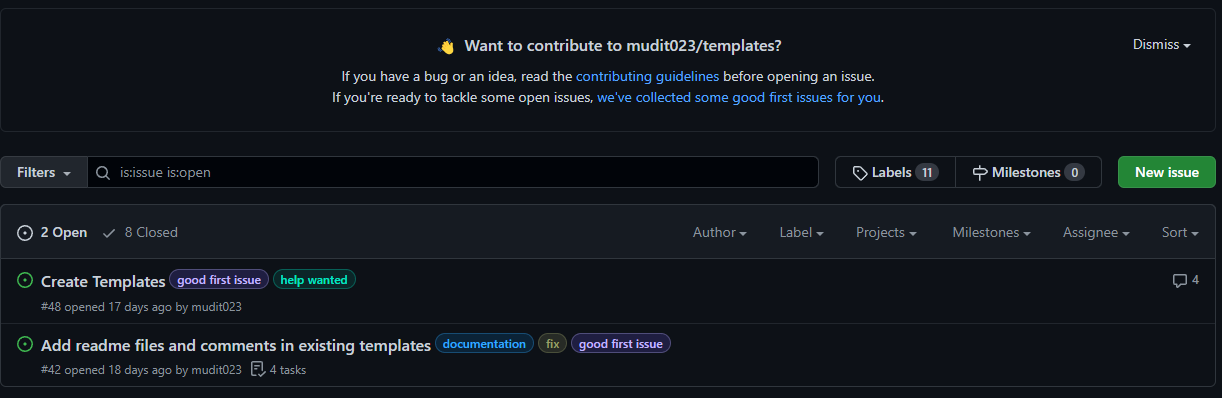
These issues are filtered by labels, good first issues are recommended for beginners. When you'll click on an issue you'll see the issue in detail with a chat section also, where you can discuss the issue with the maintainer and other contributors.
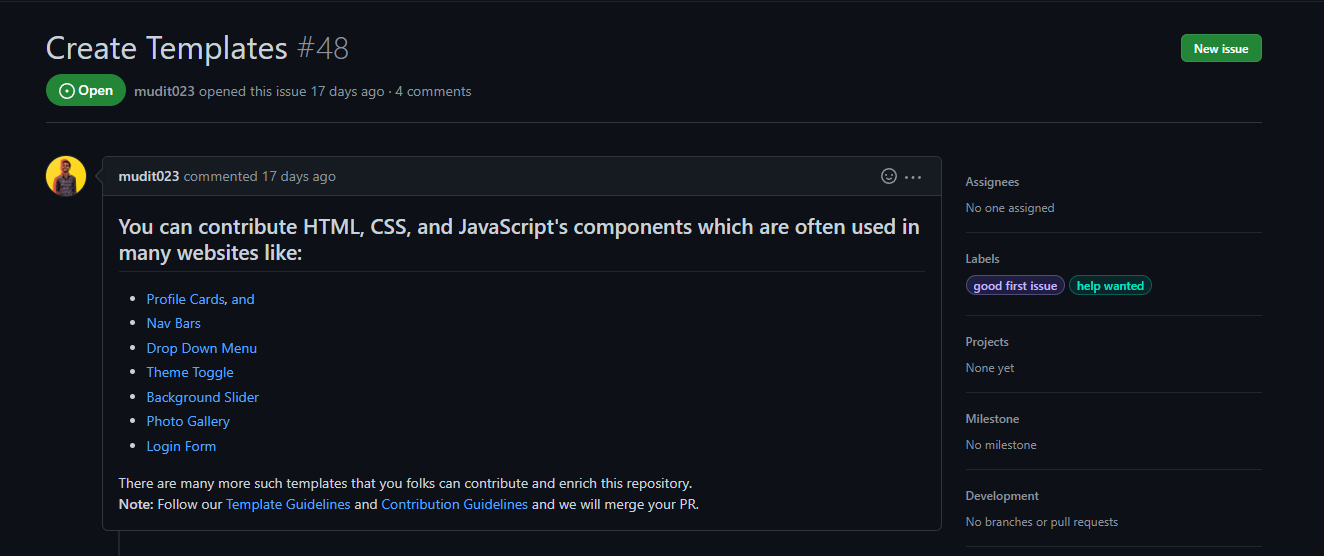
Note: Before starting to work on an issue, first comment on it and tell others that you want to work on it. If the maintainer assigns you that issue, you are good to go. Multiple people can work on the same issue(if allowed).
Step 7️⃣: Add and commit your changes
After getting permission to work on the issue, you can fire up your code editor in the cloned repository and make the changes you want. When you are done with your work, use git commands to add and commit your changes. You can use your code editors terminal for this.
git add .
This will add all the files changed to the staging area
git commit -m "my first contribution"
This will create a snapshot of your work. Now you are ready to create the PR(Pull Request).
Step 8️⃣: Create the PR
The changes you have made are only present in your system locally. We have to push our changes to our forked remote repository(not the upstream) from our system. Open up the terminal and write git push origin [branch name that you gave in step 5]. Here origin is the forked(copied) repository. And upstream is the original project.
git push origin newContribution
You have pushed the changes to the copied (forked) repo but we want the changes to get merged in the original project then only it'll be counted as a contribution. To merge the changes that you have made you have to create a pull request(PR). When you create PR you ask the permission of the maintainer/owner of the project to merge the changes you have made. Let's see how to create a PR.
✨Go to the remote forked repository and on the home interface of it, you'll see an option to create pull request. Click on it and you'll see an interface like this👇
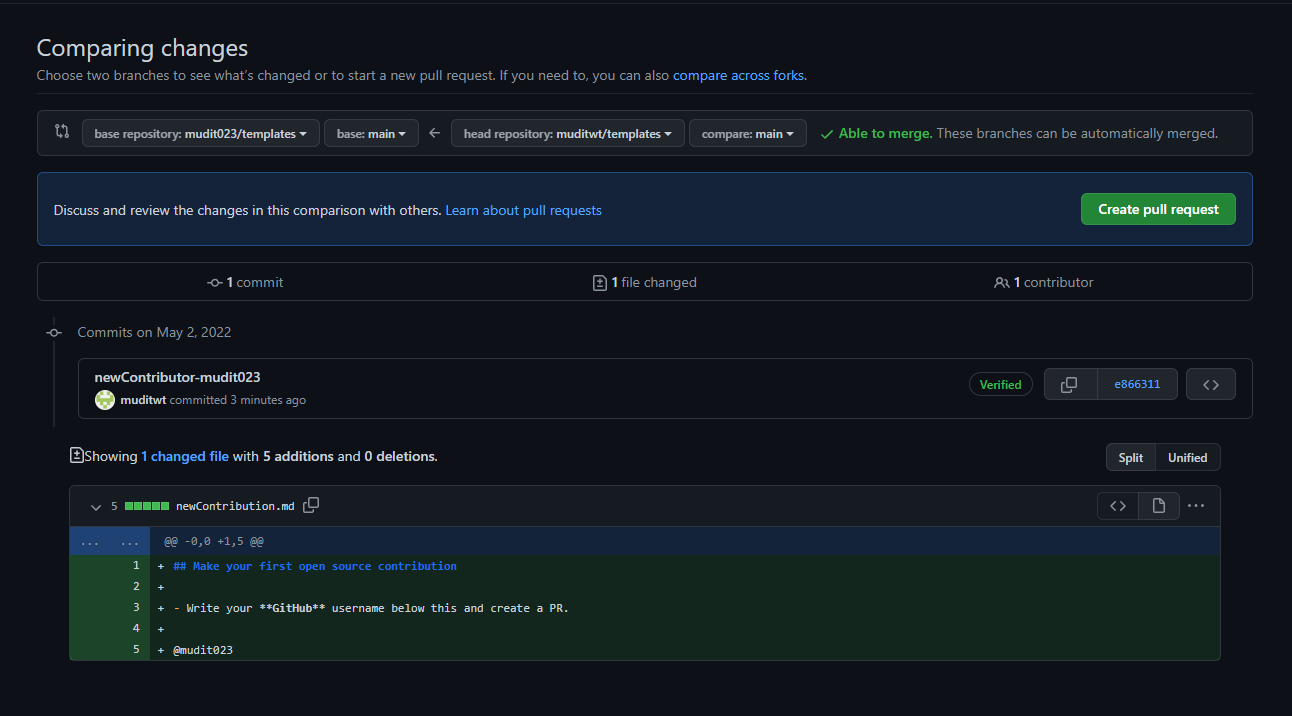
Click on create pull request again. Something like this👇 will come.

If you want to give a different message or name to your PR you can. Otherwise, just stick with the default one and click on Create pull request last time.
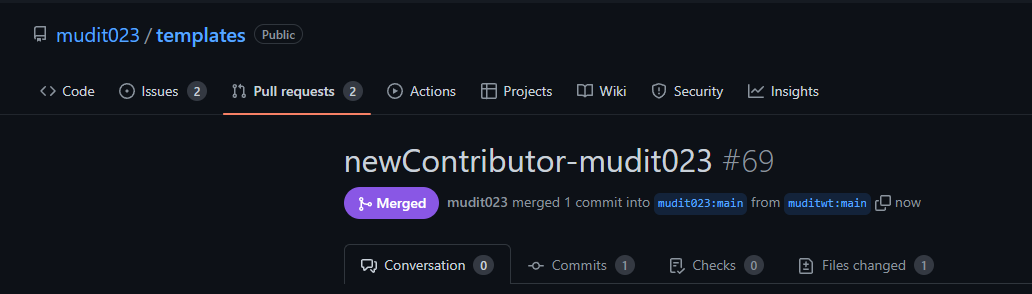
✨Congratulations you just created your first PR, you can go to the original repository(upstream) and your PR will be visible in the PR section🥳🎉🎊.
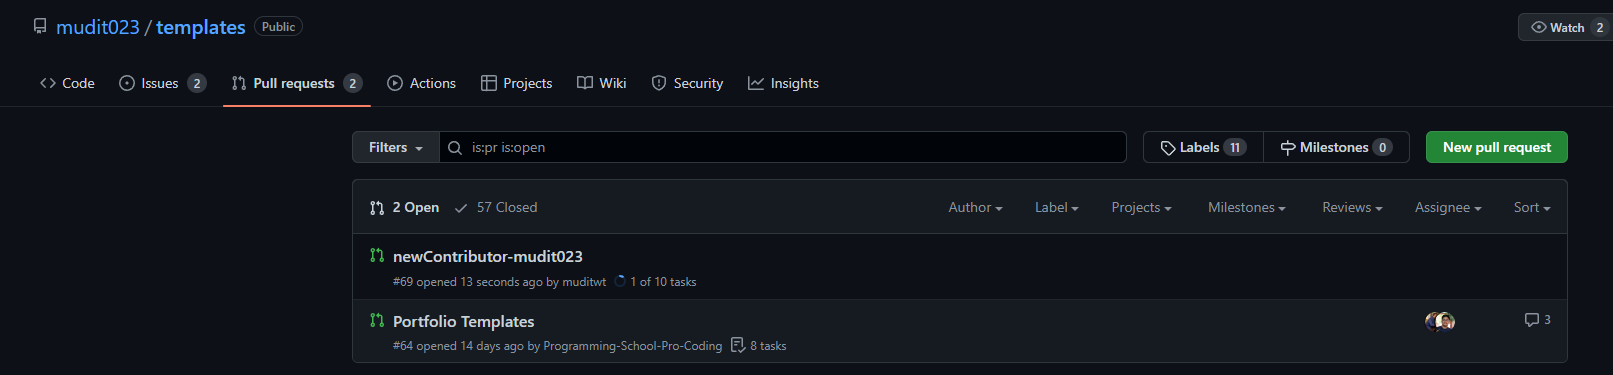
Click on your PR to check if it has passed all the tests(if any) and it does not have any merge conflicts.
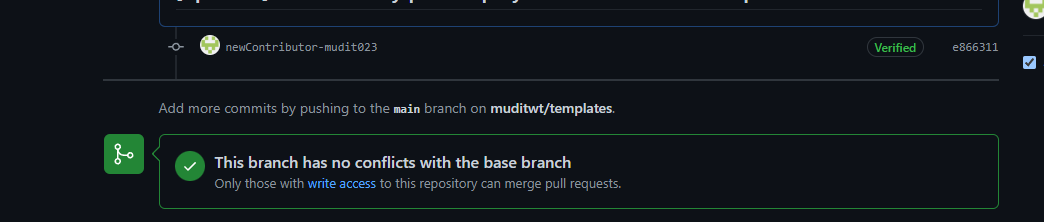
If it has no merge conflict and you have followed the project PR guidelines properly, the maintainer will merge your PR shortly. If there will be any problem, the PR section also has a comment section where you can chat with the maintainer and ask for help or a review. If the review of your PR goes well, it'll be merged🎉🎊.
Conclusion
That's all you need to start your open source journey. You are ready, don't wait and become an active contributor. The Templates project I used in this tutorial is a good place to start, go through its README, and contribute. If you have followed each and every step of this tutorial properly you should not face any problems. However, if you are facing any issues feel free to reach out to me on Twitter @muditwt.
🎁A gift to you folks for being here till the end. I have made an Open Source Checklist of all the essential steps you have to follow while contributing to the open source. It's absolutely free, purchase it now👇
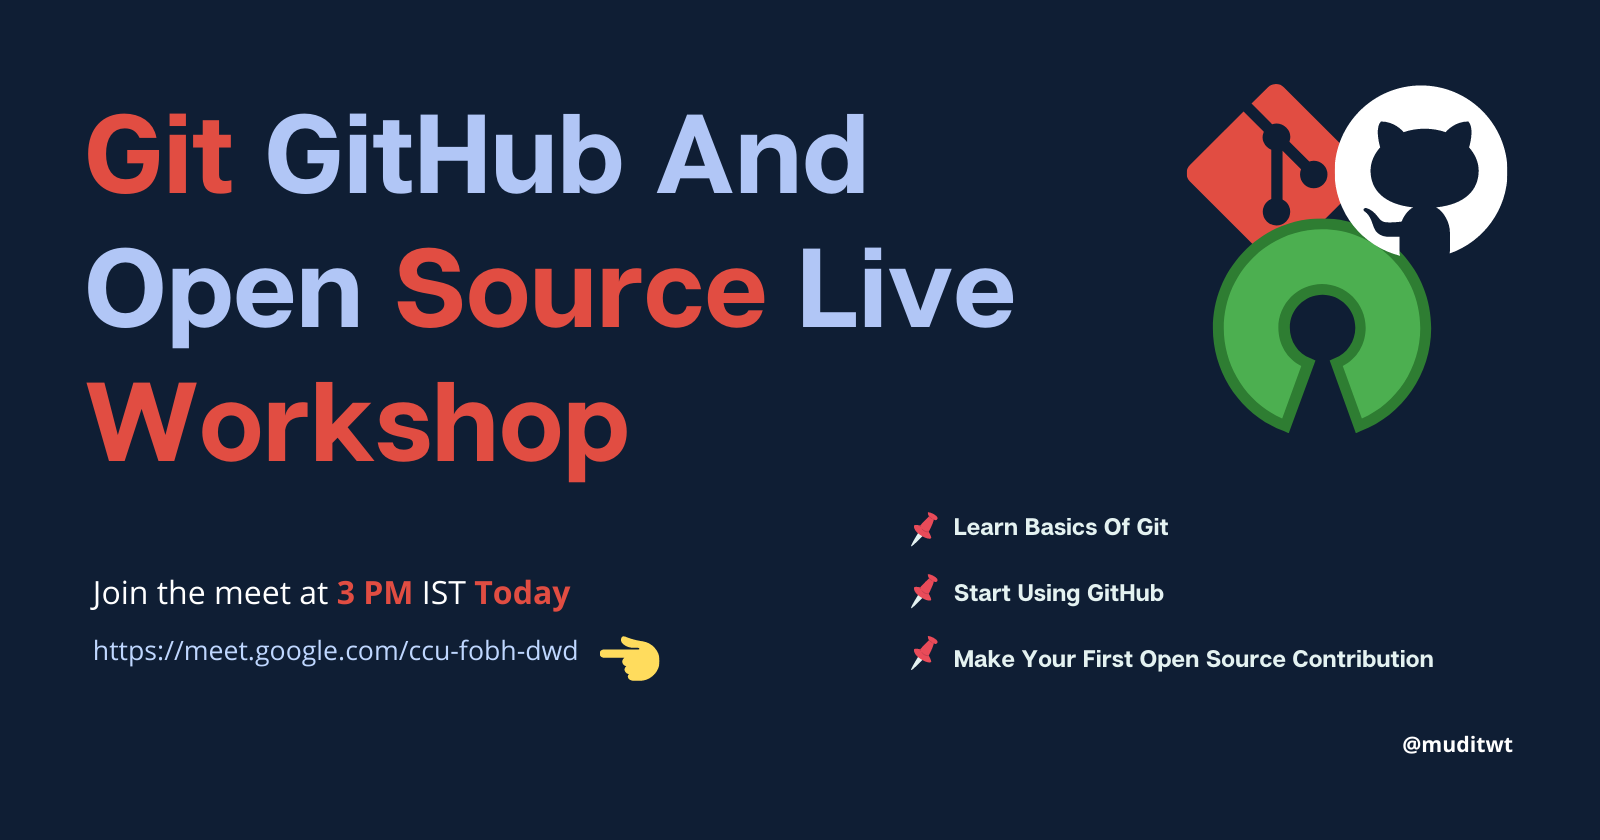
LIVE Workshop on Git GitHub and Open Source
 Join Here👇
https://meet.google.com/ccu-fobh-dwd
Thanks for reading and let me know your feedback or if you are facing any problems in the comment section. And don't forget to join the workshop at 3 PM IST Today. Follow Mudit Mishra on hashnode and @muditwt on Twitter.


