


Hey👋everyone, welcome to the first part of Git GitHub and OpenSource series. In the first part we are going to learn what is Git and GitHub and how can we use them? And then in the second article i.e., Getting Started With Open Source, we are going to discuss what is open source and how can you contribute?
Git and GitHub are very important tools for a developer and it doesn't matter at what stage of your career you are, you can learn them. So without wasting any more time let's hop into our tutorial and learn Git and GitHub.
✨I also have something huge for folks wanting to contribute to open source. A LIVE Workshop on Git GitHub and Open Source🎉. More details at the end of the article.
What is Git?
Git is a version control system, a tracking system. To make it more clear, think of Git as a superhuman caretaker of a warehouse. The caretaker will keep track of any changes made in the warehouse. If the change is done, then by whom, at what time and date, and what was the reason for that change, the caretaker will keep track of all these things. The caretaker has many superpowers, let's discuss some here:

- Can track changes.
- Can undo changes(Can go back in time👽).
- Can create multiple copies of a project and every copy can be handled separately.
- The changes in different copies can be compared and merged with a copy you want.

Why you should learn and use git?
- While doing a big project that has many components, you can use Git to work on different components separately.
- You can undo your mistakes.
- You can see all the changes the project has gone through.
Now you know what is git and why you should use it. So let's install Git in your systems and make this superhero your friend.
Installing Git
To install Git on your system, go to Git's official website and download the latest version for your operating system.

After downloading install the software, it's the same as installing any other software. Leave every option to default and click on next. Once installing is done, open cmd(command prompt) or terminal and write this command to check whether git is installed or not
git --version
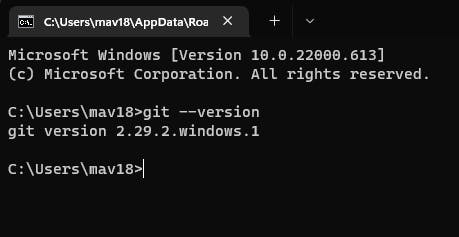
If it returns a message like the above👆, you have successfully installed Git🎉
Using Git
After the successful installation of Git, it's time for using its superpowers. But before that there is one more thing, you have to tell Git who is his owner? You have to configure it.
Step 1️⃣: Git configure
You have to set your username and email address. Git will use this to identify changes made by you. To do so, use these commands in terminal/cmd:
git config --global user.name "YOUR_USERNAME"
git config --global user.email "YOUR_EMAIL_ADDRESS"
Just make sure to put your email address and the username you want in the respective fields.
Step 2️⃣: Git initialization
Git is present in your system, but it is sleeping and it'll remain asleep until you'll wake him up. To wake him up and tell him to start working on a project, you have to use a command inside that project folder in the command prompt.
- Create a folder "Git tutorial" and open cmd inside it.
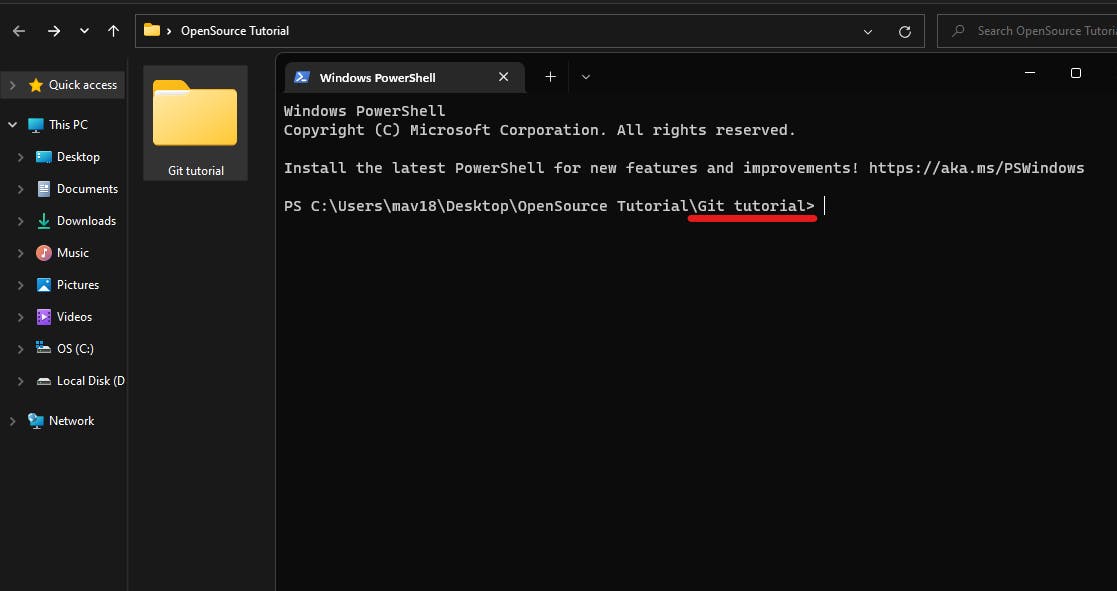
You can see the path where cmd is opened on the screen(red underline). Make sure you are inside the correct folder.
✨Now to wake Git up, the command is:
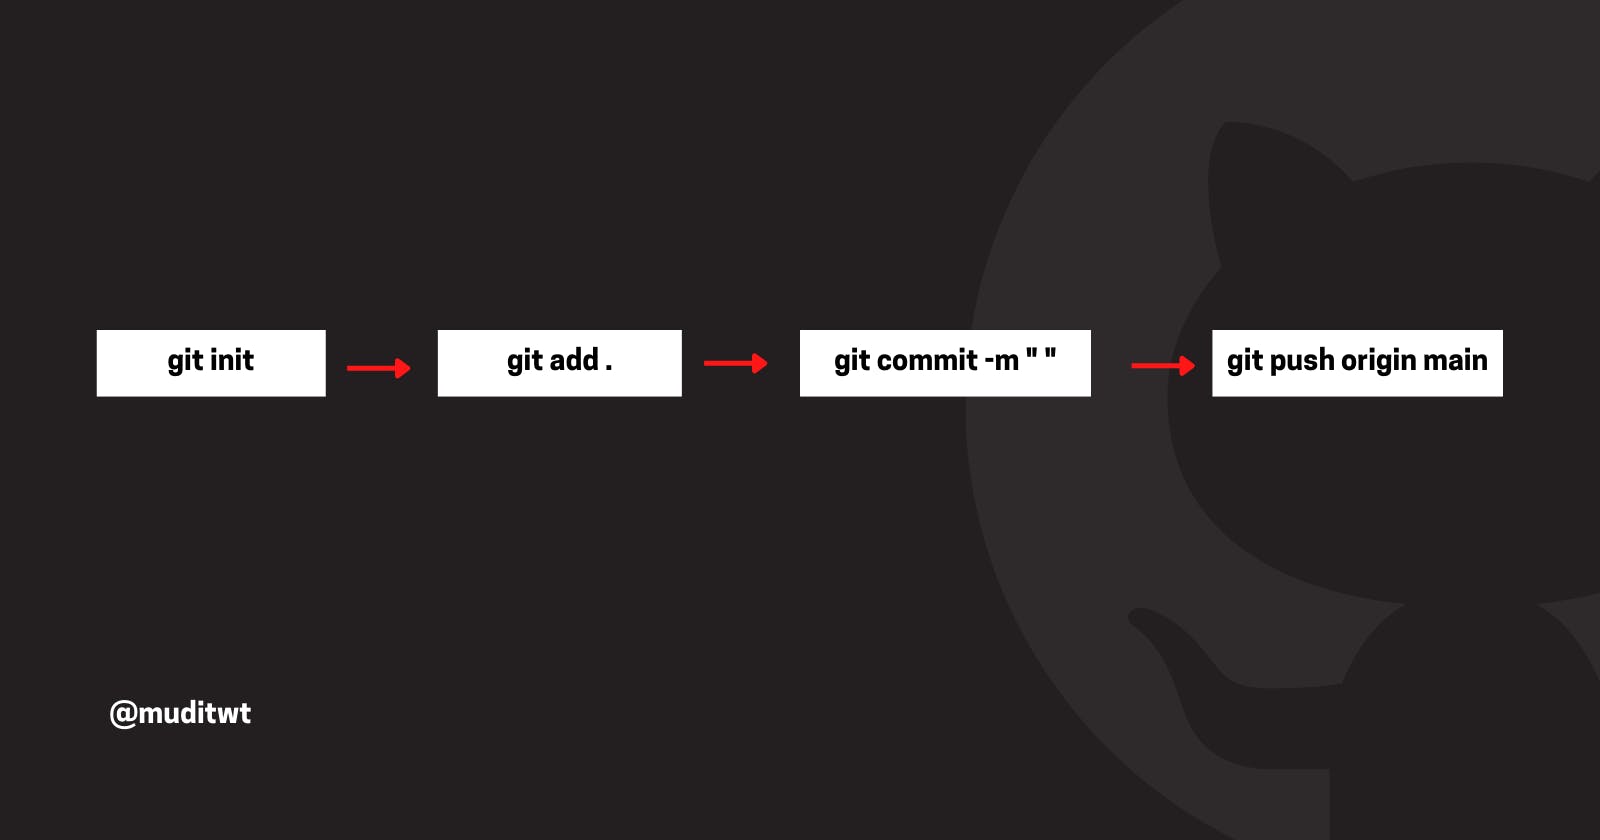
git init

Now Git is awake and can work on your project folder.
Git commands you'll use
Now you have initialized Git in your project, to use other features of Git there are several commands that you have to use.
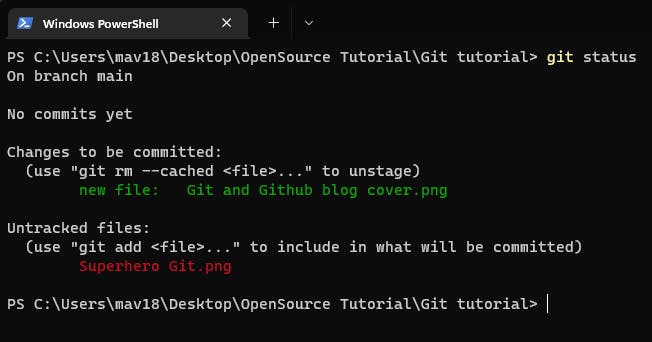
1️⃣ git status
This will tell the status of the project at the time of using the command. For example, if I add two new files: "Git and Github blog cover.png" and "Superhero Git.png" in the "Git tutorial" folder in which Git is initialized and then use
git status
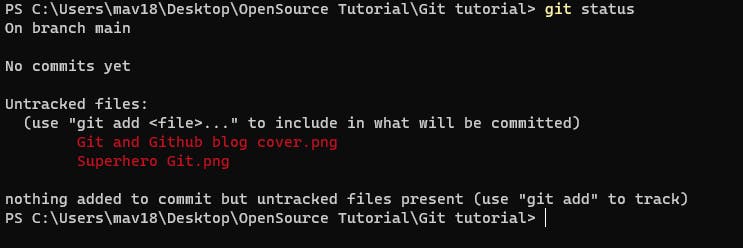
Git returns that I haven't made any commit(you'll know what commit is soon) yet and in red it says: there are two files in the folder that are not being tracked by Git. It means that if I'll make any changes in these files, Git will not be able to track those changes and undo those changes. Basically, Git doesn't know about these files.
2️⃣ git add "file_name" | git add .
To make Git know about the files you have added to the folder, you have to add those files in Git as well. There are two ways to do this, either you can add all the files at once that are not added, by using the command:
git add .
or you can add specific files by using its name in the command:
git add "file_name"
Let's see what happens after I add "Git and Github blog cover.png" to Git. To see what has changed after adding the file, use git status.
Here you can see that now Git recognizes that I have added a new file. However, there are still no commits.
✨Now it's a good time to understand different states in Git👇
Git States
Git organizes files in different states(different sections):
- Unstaged
- Staged
- Committed
- Modified
✨ When the file is not added to Git it's in the unstaged state.
✨ When the file is added to Git using git add "file_name" it's in the staged state. In this state, all the necessary changes have been made and it is ready to be committed.
✨ When we click a snapshot of our project by saving the state of the project using the command git commit -m "commit message", the state is known as the committed state. Through creating a commit your work is saved locally and if by chance something bad happens to your project in the future, you can always roll back to previous commits very easily.
✨ When we make changes in a committed file it goes into the modified state.
3️⃣ git commit -m "commit message"
Let's add a "sample.txt" file to the "Git tutorial" folder and add all the files in the folder to Git. And how can you do that? Using the git add . command. After adding all the files, we will create our first commit using the command:
git commit -m "commit message"
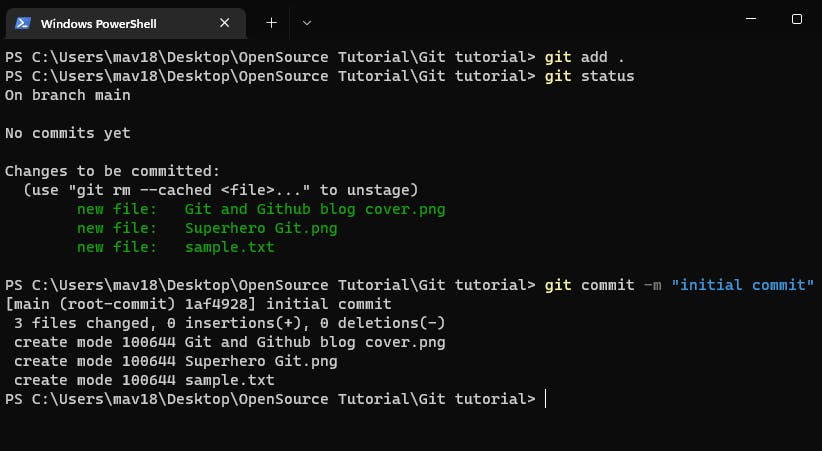
✨ And now when you'll see the git status it'll say "nothing to commit, working tree is clean". It means that all the files and the changes made are saved.
✨ A commit is like an entry on a ledger with the following information:
- Your name and email.
- The date and the time of when the commit was made.
- The commit message that you gave.
- And a unique hashcode of the commit. You can access this information using the command
git log
This will give you information about all the commits made to the project.
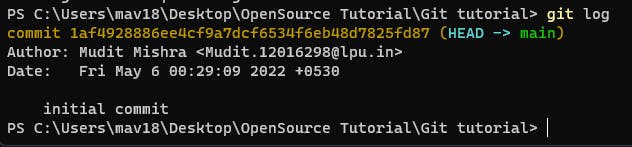
As you can see I have made only one commit.
Note: I'm not going to go into details of Git commands, there are many. I just want you to get started and figure out the rest as you progress in your development journey. Here is a cheat sheet of Git commands you should know.
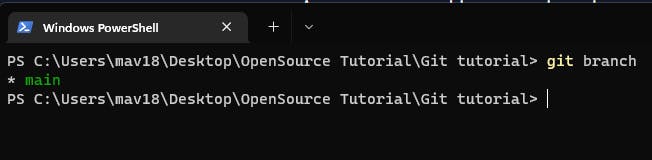
4️⃣ git branch
Git branching is a very powerful feature and an important one to know. We talked about Git's superpower to create identical copies of your project, and allowing you to work on them separately; Git achieves this through branching.

- To check branches in your project:
git branch
- To create a new branch
git branch "branch_name"
This will create a new Git branch and our whole project will get copied into that branch. Now when we check branches in our project. We'll see a new branch "my_branch"
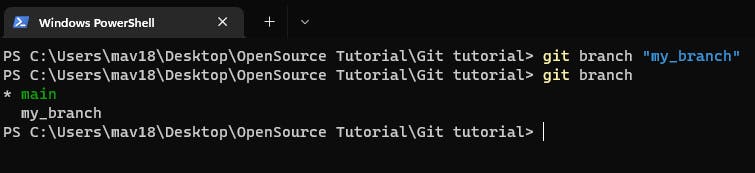
However, as you can see the asterisk(*) is still on the main. It means that you are still working on the main branch(main copy) of the project and not on the new branch.
- To move to a new branch (checkout)
git checkout "branch_name"
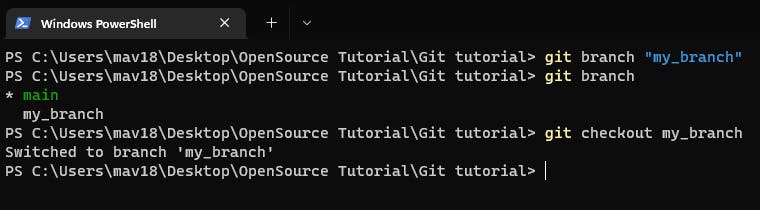
As you can see it has switched to the my_branch. In this branch or in this copy of your project you can make any changes and it'll not be reflected in the main branch or the main copy of the project. That's all for Git now, let's move to GitHub.
What is GitHub?
GitHub is a code hosting platform for collaboration and version control. GitHub lets you work together on projects. Till now you were the only person working on your project, and the project was stored locally and tracked locally by Git. This scenario is not good as your work can get lost if somehow you lose all your data. To prevent such things from happening and also to collaborate with other developers we use GitHub.
Why you should learn and use GitHub?
- To collaborate with others.
- To save your work on a remote repository.
- To show and share your work.
✨ GitHub is like social media on steroids. Don't forget to follow me😁
Using GitHub
- The first step is to create an account on GitHub(if you don't have one).
In GitHub, your projects are stored in repositories (repo for short). Let's see how we can create a repository on GitHub.
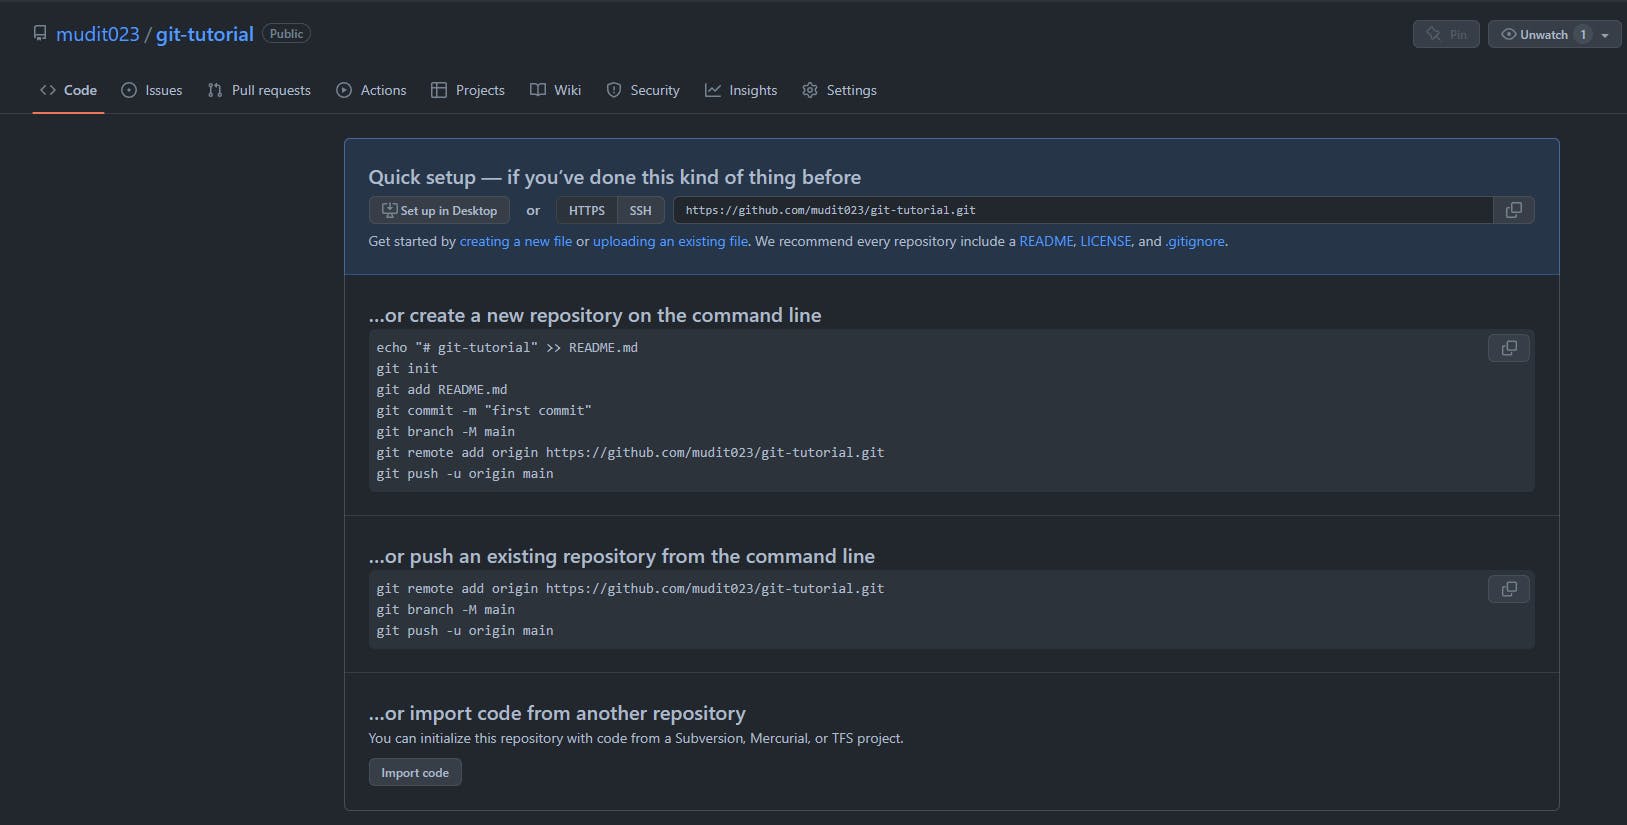
Creating a repository
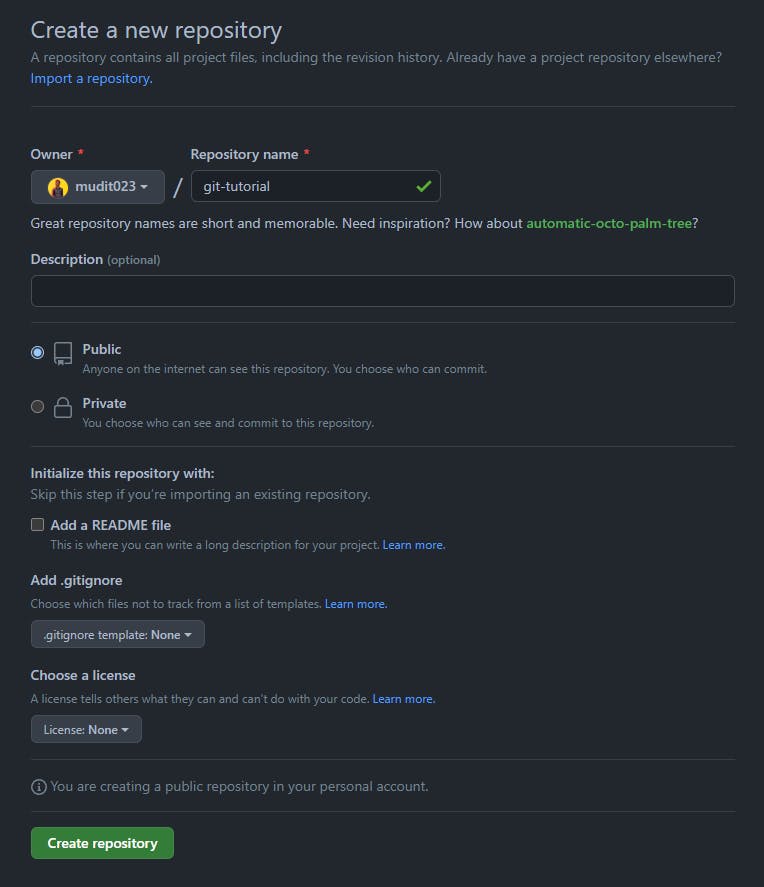
Step 1: Click on new
Step 2: Click on create repository
Give your repository a name, and description(optional), choose if you want to make it a public or a private repo(only you and the people you give access can see a private repo), and you can also add a readme and a license if you want. Otherwise, leave all that options as it is and click create repository.
✨Your repo is created
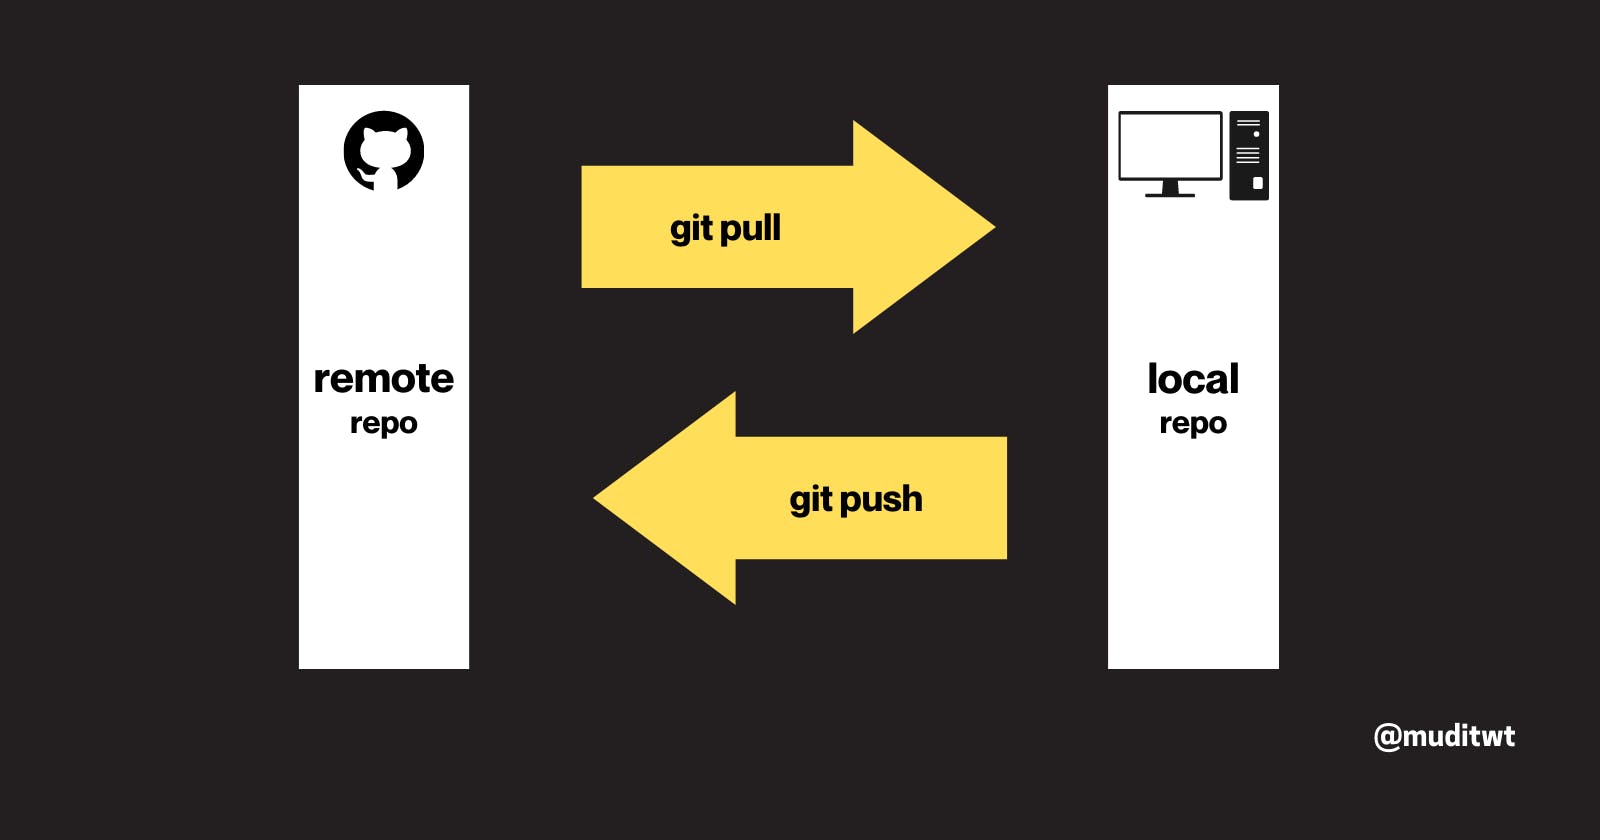
✨Step 3: Connecting your local repo to the remote repo
The GitHub repository we have created is empty, we have to upload our project into it. To do this we have to connect our remote repo(called origin) with our local repo.
- Copy the remote repo link

- Add remote to the local repo Open the command prompt in the project folder and use this Git command to connect local with remote👇
git remote add origin <remote repo url>
To check if the remote is added successfully or not use
git remote -v
This should return the origin repo link
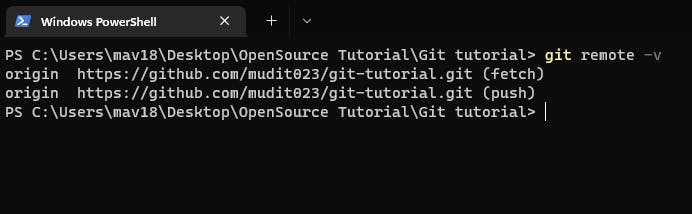
In the above git command, the origin is the name of the remote repo. We always call our remote repository origin.
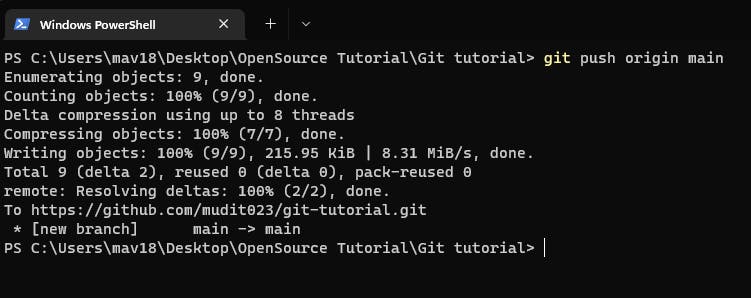
Step 4: Push your code Now it's time to push your code into the remote repo.
git push origin main
The above command means that we are uploading our code on the main branch to the origin we created previously while adding remote.
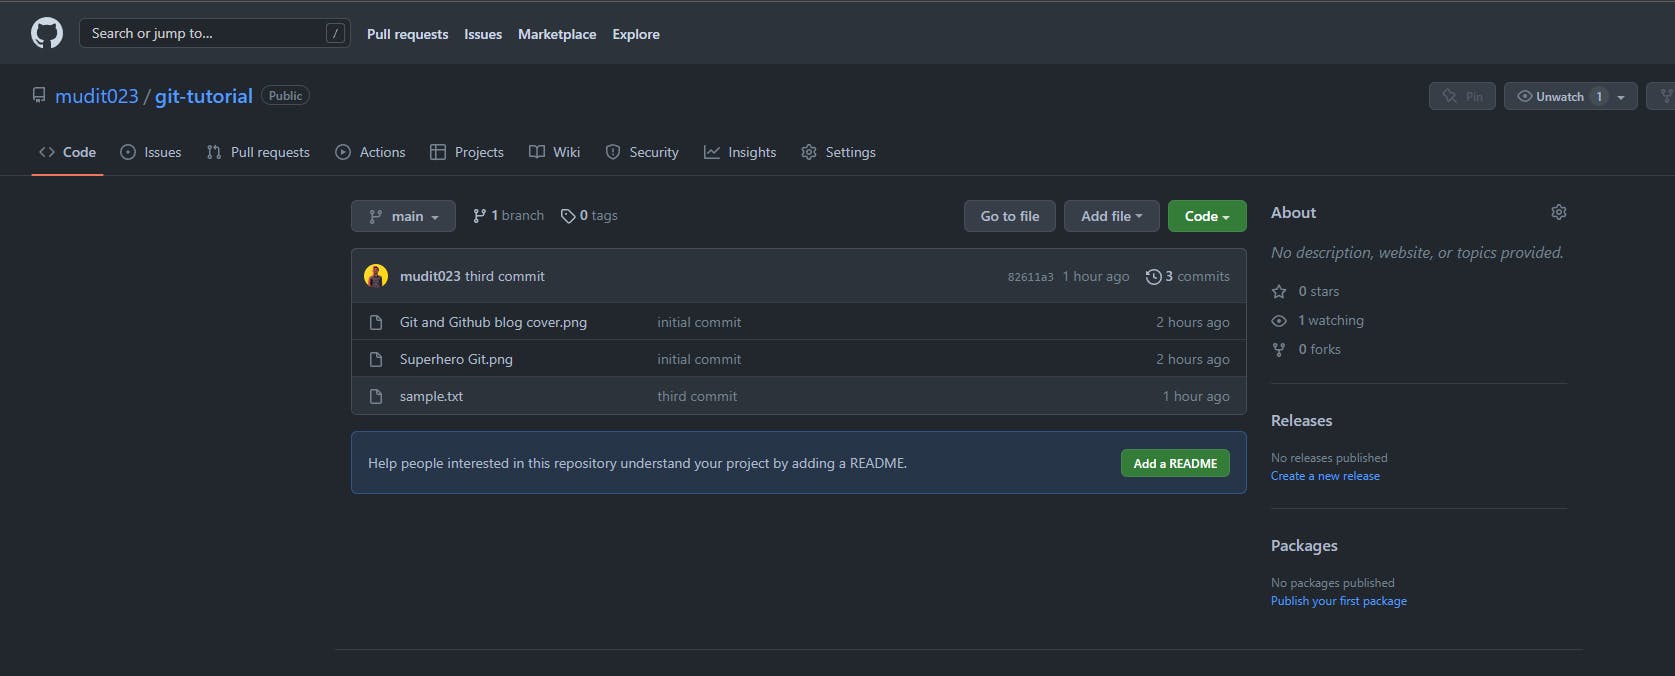
Now if you go to your remote repository and refresh it, you'll see the code that was on your system locally.
✨This is what you have to do every time you make a change in your local repository.
✨ To pull the changes from your remote project repository to the same local repository use:
git pull origin main
This means that we are downloading changes from the origin's main branch to our local repository.
Conclusion
This was a tough one! Git and GitHub are very powerful tools and they have tons of useful features. However, for a beginner, it's really important not to get overwhelmed by the huge list of features and to focus on what's really important and needed to get started. The aim of the article was to get you started with Git and GitHub and teach you a few fundamentals. After successfully completing this tutorial it's time for you to take off the training wheels and explore these tools on your own. Take help from google, there are many useful resources on the internet to learn more about Git and GitHub.
This article explained how to use Git and GitHub for your personal projects. Now in the next one Getting started with Open Source, you are going to learn how you can use these tools to contribute to open source.
✨The Live Workshop on Git GitHub and Open source will be on 8th May at 3PM IST
Join the Google Meet. Link👇
Once again thanks for reading and let me know in the comment section down below if you faced any problems. You can also DM me on Twitter: @muditwt, don't forget to follow me on Hashnode Mudit Mishra.